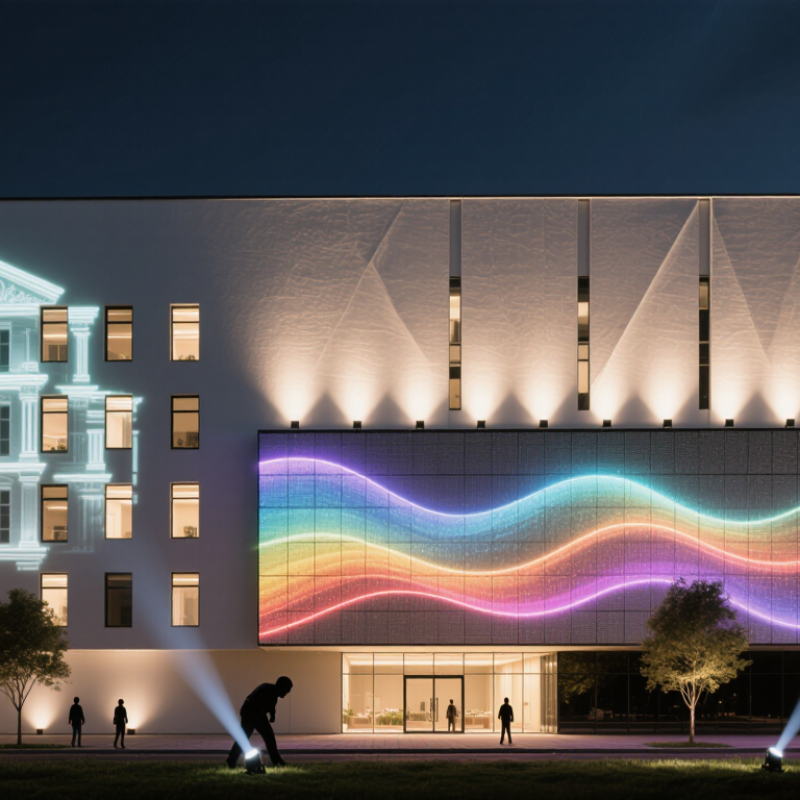
How to create a 3D light effect on a flat building facade is no longer a purely decorative question. It involves perception, energy use, hardware, software, and public comfort. A blank wall can become a layered visual surface through projection mapping, grazing light, LED media systems, or carefully controlled shadows. Yet the effect must respond to the building, not simply cover it.
The United Nations Environment Programme’s 2023 Global Status Report for Buildings and Construction shows that buildings consume roughly one-third of global energy. This makes efficient light sources, scheduling, and brightness control essential. The International Energy Agency also identifies LEDs, smart controls, and connected systems as major routes toward lower lighting demand. These findings support a practical approach: use contrast, depth, and movement before adding more power. Less light can sometimes look more three-dimensional.
Architect Louis Kahn offered a useful principle: “The sun never knew how great it was until it hit the side of a building.” His words reveal why surface, angle, and shadow matter. A successful facade effect begins with the wall’s texture, windows, setbacks, and surrounding streetscape. It should also respect drivers, residents, wildlife, and nearby businesses. No perfect recipe exists. A design may look impressive in a computer model, then feel flat outdoors. Testing at night is unavoidable. The following five methods examine projection alignment, grazing illumination, layered LED structures, animated shadows, and responsive control systems. Each method balances visual depth with installation cost, maintenance, energy performance, and long-term reliability.
Survey facade geometry with 3D scans and EN 12464-2 lighting criteria
5 Best Ways to Create 3D Light Effects on Flat Facades?
Creating convincing 3D light effects begins with accurate facade geometry, not a brighter projector. A 3D scan records ledges, recesses, windows, and uneven stone surfaces. These details reveal where light will break, pool, or disappear. Capture the facade from several positions in daylight and darkness. Check occluded areas manually. Scans can miss dark cavities and reflective glass. That limitation matters.
Use the scan as a measured base for lighting calculations. Build a simplified model, then test beam angles, mounting heights, spacing, and surface reflectance. EN 12464-2 offers useful criteria for outdoor work lighting, including maintained illuminance, uniformity, glare control, and color rendering. It may not fully govern decorative facade lighting. Confirm the project category and local requirements with a qualified lighting professional. Do not treat one lux reading as proof of quality. Human comfort can still fail beside a technically compliant wall.
Five practical approaches work well: grazing textured surfaces, washing broad planes, outlining edges, layering concealed fixtures, and projecting restrained patterns. Use scan data to keep each effect within its intended zone. Add calculation points near entrances, paths, and nearby windows. Compare predicted values with on-site measurements after installation. A handheld meter helps, but record weather, surface condition, and measurement height. Review glare from driver sightlines. A beautiful rendering can be misleading. Real facades are dirtier, darker, and less uniform than models. Leave room for adjustment.
5 Best Ways to Create 3D Light Effects on Flat Facades
Representative beam-angle ranges for facade-lighting techniques used with 3D survey data. Narrower beams create sharper grazing and projection effects, while wider beams provide more uniform wallwashing.
Design note: Use 3D scans to map facade depth, joints, openings and obstructions before aiming luminaires. Verify glare, uniformity and maintained illuminance against the applicable EN 12464-2 project criteria; the standard does not prescribe one universal beam angle for decorative facade lighting.
Reveal surface depth with 10°–30° grazing beams and layered contrast
Flat facades rarely need more brightness; they need controlled grazing. Aim narrow fixtures at 10°–30° across the surface.
Use five practical methods.
First, choose a 10° beam for deep joints and coarse stone. A 30° beam creates softer gradients on smooth plaster.
Second, shift fixtures sideways to reveal texture, not only height.
Third, layer light from the base, middle, and roofline. Keep each level slightly different.
Fourth, add quiet fill light behind architectural projections. This prevents harsh black gaps.
Fifth, dim each layer independently after sunset. The composition should breathe.
Begin with a full-scale mock-up. A small sample can mislead. At 10°, a misplaced fixture may create a long, distracting stripe. At 30°, excessive overlap can flatten the facade again. I still find this mistake common. Measure brightness at pedestrian height, not only from the street. Check glare from nearby windows and sidewalks.
The IEA’s Energy Efficiency 2023 report estimates that lighting represents about 15% of global electricity use. Efficient control matters. The U.S. Department of Energy reports that LED lighting can use at least 75% less energy than incandescent lighting. Follow CIE 150:2017 guidance to limit obtrusive light and unwanted upward spill. Use low-output accents where possible. Let shadow remain visible. Depth needs contrast.
Add backlighting with 3,000–6,500 K LEDs and IP65-rated fixtures
5 Best Ways to Create 3D Light Effects on Flat Facades?
Flat walls can gain depth through five practical methods: grazing, halo backlighting, recessed edge lighting, layered illumination, and controlled color zoning. Backlighting works especially well behind perforated panels or floating letters. Keep a 50–150 mm cavity for airflow and shadow separation.
Choose 3,000–3,500 K for warm masonry and residential facades. Use 4,000–5,000 K for neutral commercial surfaces. Reserve 5,500–6,500 K for crisp, high-contrast details. The International Energy Agency’s Energy Efficiency 2023 report estimates lighting uses about 15% of global electricity. Efficient LEDs can reduce demand, but poor aiming still wastes light. The U.S. Department of Energy reports laboratory LED packages exceeding 200 lumens per watt, while installed systems usually perform lower.
Tips: Select IP65-rated fixtures for dust-tight protection and water jets, as defined by IEC 60529. IP65 does not mean immersion protection. Seal cable entries carefully. Add drainage where water may collect. Test the facade at night before final mounting. I often see designers choose excessive brightness first. It usually creates glare, not depth. Use dimming, narrow beams, and separate circuits for easier control. A small color-temperature mismatch can make one panel look strangely detached.
5 Best Ways to Create 3D Light Effects on Flat Facades? - Add backlighting with 3,000–6,500 K LEDs and IP65-rated fixtures
| No. |
Lighting Method |
How It Creates a 3D Effect |
Recommended CCT |
Typical Fixture and Protection |
Mounting Guidance |
Typical Power Range |
Best Application |
| 1 |
Halo Backlighting |
Places LEDs behind raised letters, panels, or logos so light forms a controlled halo around the edges and visually separates the surface from the wall. |
3,000–4,000 K |
IP65 or higher
Low-voltage LED modules or linear LED fixtures with diffuse output. |
Use a concealed rear gap of approximately 50–150 mm, depending on the material and desired halo width. |
8–18 W/m² of illuminated feature |
Raised signage, entrance features, metal panels, and architectural lettering. |
| 2 |
Grazing Light |
Illuminates the facade from a close distance, revealing joints, grooves, brickwork, stone texture, and shallow relief through highlights and shadows. |
3,000–3,500 K for warm texture; 4,000 K for neutral texture |
IP65 or higher
Asymmetric wall-grazer or narrow linear fixture with glare control. |
Position fixtures about 100–300 mm from the surface; test carefully because uneven walls can produce hot spots. |
10–25 W/m² of facade |
Textured cladding, masonry, ribbed panels, and shallow architectural details. |
| 3 |
Up-and-Down Wall Washing |
Creates vertical layers of light and shadow by washing the upper and lower portions of a flat elevation from opposing directions. |
3,500–4,500 K |
IP65 or higher
Linear wall washers or adjustable floodlights with symmetrical or asymmetric optics. |
Install at the base and, where appropriate, at an upper ledge; use spacing that provides overlapping beams without visible dark bands. |
6–15 W/m² of facade |
Large blank walls, podium elevations, atriums, and commercial frontage. |
| 4 |
Layered Cove and Reveal Lighting |
Combines concealed light in horizontal or vertical recesses to create depth lines, visual frames, and a floating-panel appearance. |
3,000–4,000 K |
IP65 in exposed zones
Continuous LED strips or linear fixtures installed in aluminum channels with diffusers. |
Keep the light source hidden from normal viewing angles; provide heat dissipation and access for maintenance. |
5–14 W/m² of feature area |
Recessed facade panels, canopies, parapets, window surrounds, and horizontal bands. |
| 5 |
Dynamic RGBW Accent Lighting |
Adds programmable color, gradients, or timed transitions to outline facade zones and make a flat elevation appear segmented and volumetric. |
3,000–6,500 K in white mode; RGBW for color scenes |
IP65 or higher
Outdoor-rated RGBW linear fixtures, floodlights, or pixel-controlled modules. |
Use concealed mounting, consistent fixture spacing, and a lighting control system; avoid excessive brightness in residential areas. |
10–30 W/m² of illuminated feature |
Events, hospitality venues, entertainment spaces, civic buildings, and feature facades. |
|
Planning note: Use IP65-rated fixtures as a minimum for exposed outdoor locations, confirm the required IP rating with the project conditions, and select optics, spacing, brightness, and mounting distance through on-site mock-ups. The listed power values are typical planning ranges rather than guaranteed performance specifications.
|
Map projections with 10,000–30,000-lm projectors under CIE 150:2017 limits
5 Best Ways to Create 3D Light Effects on Flat Facades?
Projection mapping can turn a flat facade into layered architecture, but projector power needs discipline. With 10,000–30,000-lumen units, measure facade reflectance, viewing distance, and surrounding brightness. Pale concrete may appear dazzling, while dark stone absorbs detail.
Five reliable effects work well: depth gradients, moving textures, sharp window frames, simulated shadows, and restrained color washes. Keep each effect connected to the building’s real geometry.
CIE 150:2017 should guide the lighting assessment, not replace local requirements. Check obtrusive-light indicators at nearby windows, roads, and property boundaries. Measure vertical illuminance after dark, including the brightest scene. Control upward spill, glare, contrast, and operating hours.
A 30,000-lumen projector can still operate responsibly when content brightness, lens angle, masking, and intensity work together. Schedule dimming during sensitive hours, and record readings from several observer positions.
Edge blending prevents visible seams across multiple projectors. Black masks protect windows and balconies from accidental highlights. Test in rain, haze, and changing ambient light. Weather can flatten color and increase scatter.
The first version may look impressive but exceed a neighbour’s visual comfort. That is a design failure, not a minor technical detail. Recheck measurements after installation, because real facades rarely match drawings perfectly.
Conclusion
How to create a 3D light effect on a flat building facade begins with understanding the surface itself. Use 3D scanning or detailed geometric surveys to identify planes, recesses, edges, and textures, then plan the lighting according to EN 12464-2 criteria. Grazing beams positioned at approximately 10°–30° can emphasize shallow relief, while layered contrast adds visual depth without altering the structure. Carefully selected color temperatures between 3,000 K and 6,500 K, combined with IP65-rated fixtures, can create controlled backlighting for architectural details.
For more dynamic results, a media facade can use LED modules with P2.5–P6 pixel pitch and DMX512 control to display textured movement or dimensional patterns. Projection mapping offers another flexible approach, using 10,000–30,000-lumen projectors to align imagery with the facade’s geometry. All projected brightness, contrast, and spill should be managed under CIE 150:2017 guidance to reduce glare and protect surrounding areas.

 WoodLit Light